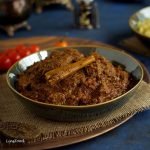
Chicken biryani or biryani of any kind, is always a dish for a special occasion. Layers of intoxicating aroma and flavour from the rice, the curry, aromatics and spices, it’s definitely something to be celebrated.
Estimated reading time: 12 minutes
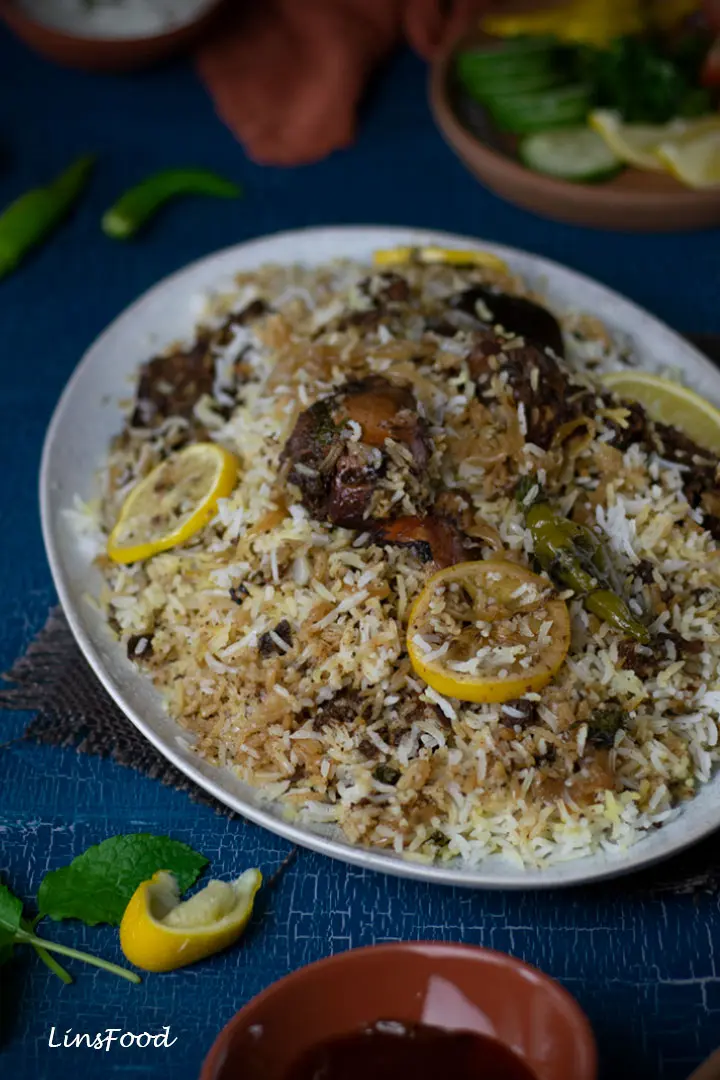
Chicken Biryani Recipe
I’m not going to lie, it does take a bit of an effort and there is a long list of ingredients. It is, after all, something we cook for special occasions. And special occasions call for a little effort, no?
Just get everything ready, follow the steps, and you’ll see, it’s not complicated at all.
I know there are lots of easy biryani recipes out there, and those cooked in instant pots and pressure cookers. But this is not one of them!
Maybe we’ll do those when this blog is a couple of years old. I promised some readers that I would do some Deepavali (Diwali) recipes, and here I am, finally getting to it, a little later than I had planned.
There are basically 3 parts to cooking today’s chicken biryani:
- cooking the chicken curry
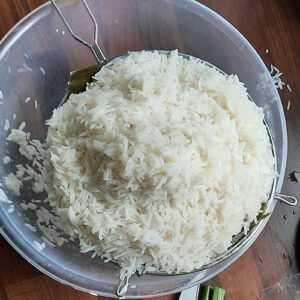
- parboiling the rice
- layering everything and steaming
I walk you through it with photos. Each part above and its ingredients are clearly broken down in the recipe card below, to make it easier for you to follow.
How to cook Chicken Biryani at Home
These are the steps involved in the recipe:
- Marinate the chicken – I prefer this done the night before for maximum flavour.
- Prep work – chopping and soaking saffron.
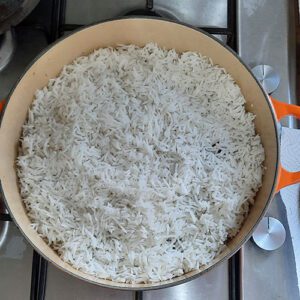
- Parboil the rice and drain.
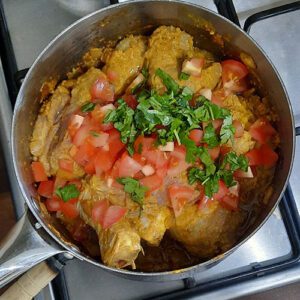
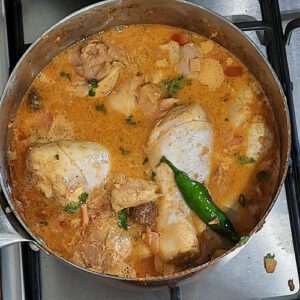
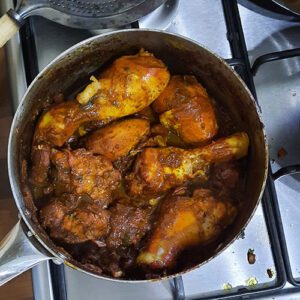
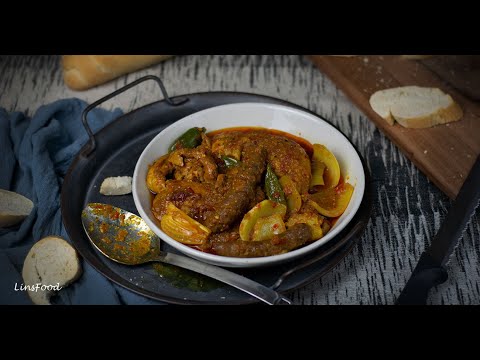
- Cook the chicken curry with the spices and marinated chicken.
- Caramelise some onions with oil and ghee – 20 minutes, optional step, can be replaced with shop bought crispy fried shallots.
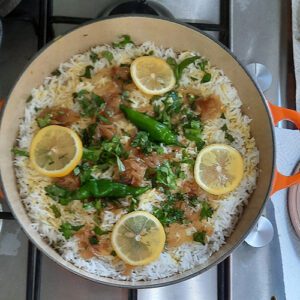
- Layer the rice and dry-ish chicken curry and steam the whole lot for 20 minutes.
- Leave to rest for 10 minutes before serving.
It’s perfectly doable, isn’t it?
Types of Biryani
As this is my first biryani article on SMR, here’s a little background. If you’re not bothered about this, skip down to the ingredients.
Many food historians believe that biryanis are a Persian legacy via the Moghuls. I talk a little about the Moghul influence on the food of the Indian subcontinent on the Kashmiri page on LinsFood.
While there are many regional types of biryanis, this South Asian masterpiece can be divided into 2 distinct types, in the way that the biryani itself is cooked: kacchi and pukki.
Kacchi Biryani
The word kacchi means raw (the feminine form of kaccha). So in this version, the rice and the meat are layered raw, sealed in a pot and cooked slowly over a low flame.
Naturally, for novices, this could be a slightly daunting affair as one can easily overcook the rice, ending up with a stodgy mess.
I’m a bigger fan of briyanis cooked this way, as I find the rice is better able to absorb the flavours. But that’s a post for another day!
Pakki Biryani
So pakki means cooked (the feminine form of the word pakka). And this is the version we’ll be employing today for our chicken biryani. Essentially, the meat is fully cooked in the form of a dry curry and the rice is also parboiled.
These are then layered and steamed in a sealed pot, again on a low flame, but not as long as in the kacchi biryani.

Dum Biryani or Dum Style Biryani
Dum Biryani or dum style simply refers to the steaming method of cooking, and includes biryanis and all sorts of dishes. It is also referred to as dum phukt.
In Hindi, dum means to breathe and phukt means to cook. Food cooked this way (not just biryanis, curries too) is placed in a heavy bottomed pot, sealed with dough, then slow cooked over a low flame, with plenty of steam in the pot. This allows the flavours to be released slowly and fully absorbed.
In the absence of dough (something I’ll do in later biryani posts), the tradition is to wrap your lid in a tea towel to ensure a tight fit and also to absorb extra moisture. I employ this tea towel method when cooking pilau and Persian rice dishes, but not when cooking biryani. This is because I want my biryani moist, and I don’t want that tea towel to absorb the steam in the pot. So when cooking biryani, when you don’t want the contents of your pot to dry out, you don’t want to use a tea towel. Aluminium foil will work better.
Chicken Biryani Ingredients
The ingredients for cooking an authentic chicken biryani are pretty easy to find. I use the term authentic fairly loosely here, as there are countless regional and familial variations to this beloved South Asian rice dish.
Let’s take a quick look at some of the ingredients that we need to pay attention to:
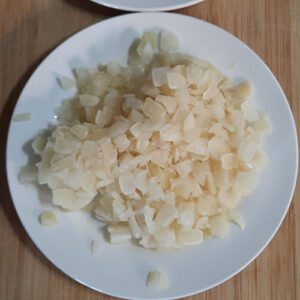
Basmati Rice
You want basmati rice to cook a great chicken biryani. Its light floral aroma, along with its fluffy-when-cooked nature makes it the perfect choice for slow cooking. Jasmine rice will produce a slightly stodgy affair, with its starchier body.
Aged basmati rice is the best there is, and you will be able to recognise it from its golden colour as well as its heightened perfume.
However, it is also more expensive, so get the best that you can afford.
To Soak Basmati or Not?
Over the years, I’ve had countless SOS messages about basmati rice that has fallen apart upon cooking various dishes. The culprit here is the soaking of the rice.
I stopped soaking basmati rice years ago, and have always advised my students and readers to do the same. Let me tell you why.
Many of us outside the Indian subcontinent don’t have access to top class, aged basmati rice. And when we do, it’s phenomenally expensive. The basmati rice we do get isn’t aged as much, and doesn’t need and doesn’t want soaking.
So if you want your rice to maintain its integrity and not fall apart upon cooking, don’t pre soak the rice.
The Chicken
Unless I’m roasting a whole chicken, I always buy chicken portions to cook at home. I find this easier and more user friendly. It’s up to you what portions to use. Use chicken breast if you prefer, but as I find them rather bland, I tend to go for drumsticks, legs and chicken thighs.
You definitely want some of your chicken on the bone, as bones always give additional depth of flavour to curries and stews. And that will transfer over to the chicken biryani as a whole.
Spices and Aromatics
We use both ground and whole spices in our chicken biryani. Let’s take a closer look at some of them.
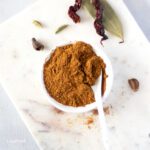
Biryani Masala
In the last post, I shared with you the homemade biryani masala I use when cooking biryanis and even pulaos. It’s a very easy spice mix to make, and can even be used as garam masala.
You don’t have to make this biryani masala, but if you have the time and inclination, I urge you to make it. It’s highly aromatic and your biryani will thank you for it.
Use shop bought garam masala, if you prefer, but try and stay away from any shop bought boxed biryani spice mixes. Because this recipe is all about making chicken biryani from scratch.
Kashmiri Chilli Powder
Our chicken biryani isn’t going to be spicy. So the chilli powder we use will have to be mild. Well, unless you want a spicy biryani, that is.
Traditionally, we’d use Kashmiri chilli powder because as you can read in this article on LinsFood, Kashmiri chillies are super mild, grown for their vibrant red colour, and not their heat. Can’t get genuine Kashmiri chilli powder? Use the mildest red chilli powder you can find.
How to tell if your Kashmiri chilli powder is the real deal? Taste it. If it’s spicy, it’s not. It should only have a slight hint, milder than a jalapeño.

Cardamom
We use both green and black cardamom pods in our chicken biryani today. Black cardamom is much bigger than the common green, and has a smoky flavour. It adds depth to curries and spice mixes.
If you can’t get it, just leave it out.

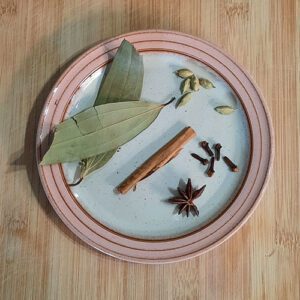
Indian Bay Leaves (Tej Patta)
Indian bay leaves, as I explain in the biryani masala post, is a completely different herb from the Mediterranean one. It has an elongated shape and is spicy in terms of aroma, instead of herbal like the common bay.
So one is not a substitute for the other.
However, by all means, use regular bay leaf for the beautiful flavour it imparts. I do, on the odd occasion when I run out of tej patta.
Saffron
Saffron, while not essential when cooking biryani, gives it a wonderful depth of flavour and aroma. Because we sprinkle the saffron liquid all over our rice, it also imparts an additional layer of colour.
So I would definitely encourage you to use it. Why use food colouring?
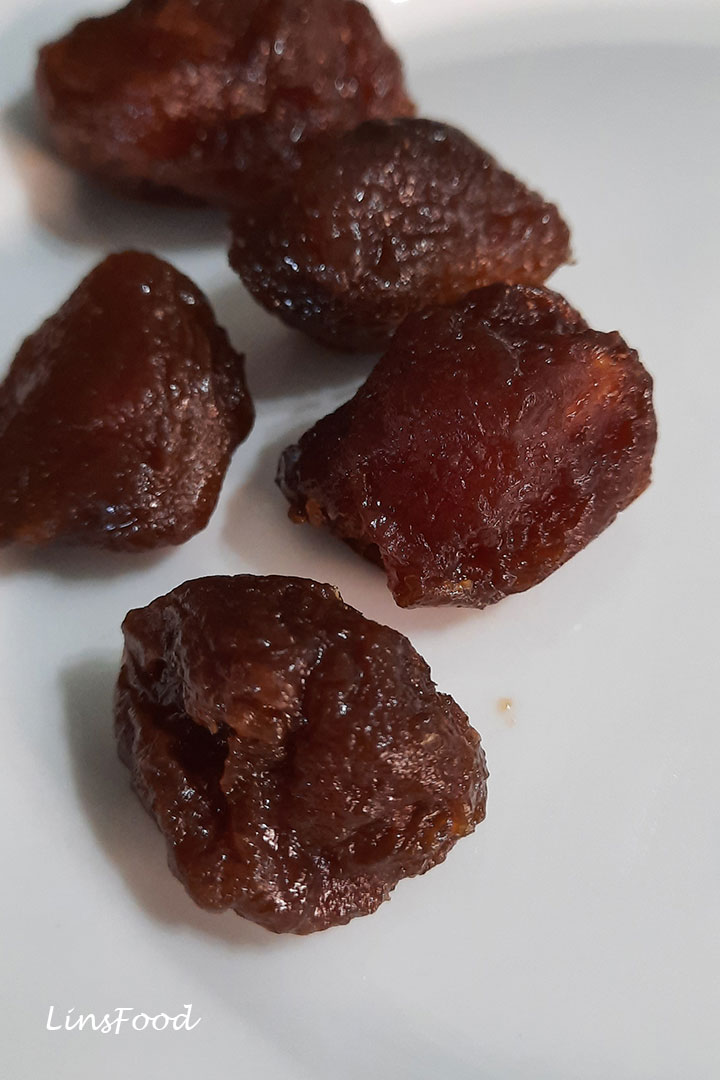
Dried Sour Plums
Now I know you’re probably thinking prunes. Prunus bokharensis are from Asia. The dried version, called alu bukhara are used in Persian, Central Asian and Pakistani cooking. And they tart, unlike prunes, which are sweet.
This is definitely something I picked up once I came to the UK. If you’ve been buying your biryani mixes, you might have come across the ones labelled Sind Biryani (or Sindh). These would definitely contain one or two of these dried plums. And in case you’re wondering, Sindh is a province in Pakistan.
These dried plums add another delicious layer of flavour to our chicken biryani, and I love them. But do be careful, as they are a stone fruit, and you might want to lose that stone before adding to your biryani, if you are concerned about choking.
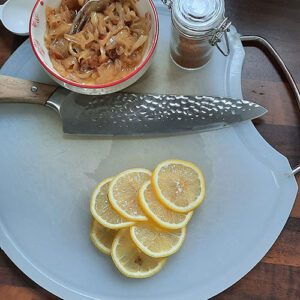
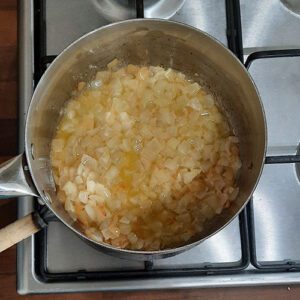
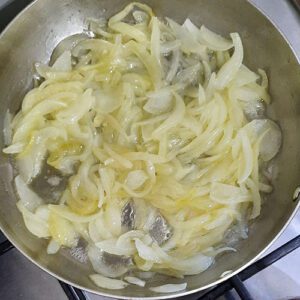
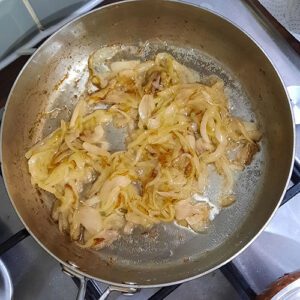
Caramelised Onions
I don’t cook biryanis without caramelised onions. They are a weakness of mine, and I love them with just about anything: rice, sandwiches, burgers, salads, pizzas, soups and so much more!
The caramel sweetness they impart is yet another delicious part to your biryani, and the perfect foil to spice. I spend about 20-30 minutes making them while the biryani chicken curry is cooking. If you don’t fancy them, use shop bought crispy fried shallots or onions.
Ginger Garlic Paste
Feel free to use shop bought garlic and ginger paste if that’s what you always do. I tend to just blitz them to use when I actually need them, just like my mum and granny used to.
To make your own, you just need roughly the same weight of garlic as ginger, and just pound or chop to a paste, with some water. That’s it. About 2 medium cloves garlic to 2.5 cm (1 inch) ginger.
What Pot to use for Chicken Biryani
You can use any deep, heavy bottomed pot or a quality dutch oven. The idea is to allow the ingredients to steam away without the rice burning at the bottom of the pot.
If you don’t have a saucepan with a heavy base, then place your pot on a diffuser or even a flat griddle.
If you are concerned that your rice will burn at the base, you can always start with your chicken curry as the first layer.

How to Serve this Chicken Biryani
Biryanis are your ultimate one pot meals. If you are making a meat based biryani like today’s, you’ve got your carbs and protein already. So all you need is a light green salad and raita to make it even more of a complete meal.
Yoghurt is a traditional accompaniment to savoury dishes in many cultures, and this is certainly true in India and Pakistan. The cooling nature of yoghurt provides the perfect balance to the spice (not heat) of this chicken biryani.
Finally, have some lemon wedges on the side, so everyone can have some freshly squeezed lemon juice with their portions. Oh, and some fresh green chillies are always good too.
This mango sambal would go amazingly with it too.
Basic Raita Recipe
Until I get some raita recipes on SMR, here’s a basic and easy raita.
Tip out your yoghurt into a bowl, and add a pinch of salt, a little chopped up cucumber, green chillies and a small shallot. If you want, you could also dry roast a pinch of cumin seeds in a small frying pan, for 30 seconds on medium-low heat, and add this to the yoghurt.
Mix well and chill until needed.
Over on LinsFood, I have a couple of Persian yoghurt dips that would be perfect served with this chicken biryani:
- Borani Laboo (Beetroot Yoghurt)
- Mast o Khiar (Cucumber Yoghurt)
If this is your first time cooking biryani, don’t sweat it. Just get everything ready, and follow the steps in the recipe card below. Practice makes perfect, and if your chicken biryani isn’t perfect this time, it doesn’t matter, because it will still be delicious!
So, shall we get cooking?
If you like the recipe, don’t forget to leave me a comment and that all important, 5-star rating! Thank you!
And if you make the recipe, share it on Instagram or Facebook and tag me @azlinbloor, and hashtag it #linsfood
Lin xx
More Festive Recipes