
Koshari is a rustic, no frills, comforting carbfest of epic proportions! Rice, pasta, noodles, chickpeas, lentils – all topped with some crispy, yummy onions, tangy tomato sauce and a spine-tingling cumin sauce!
Estimated reading time: 11 minutes

What is Koshari?
Koshari is a dish that raises eyebrows when you first come across it.
Now, the combination of rice and noodles, rice and lentils is nothing new, you see it in other cultures too. Like the Persian Reshteh Polo on this site (click for recipe).
Then there is the South Asian khichdi, real comfort food of spiced rice and lentils, that also comes in other combination. It is this khichdi that is said to be the precursor of the Egyptian kushari.
Origin of Koshari
There are a few differing theories to the origin of this much loved Egyptian street food. Some people say it is thousands of years old, having come about in ancient Egypt. The word koshari is a derivation of the word kosheir, which refers to the mainly vegetarian, gruel-like, frugal food of the poor.
Much like how the Italian risotto started life as la cucina povera before acquiring its superstar status.
The other theory is that koshari was created sometime in the early 20th century. When the Brits started their occupation of Egypt in 1882, they brought along many Indian workers and soldiers. These soldiers inevitably introduced their own foods to the locals, and one of them was khichdi, that rice and lentil comfort dish.
The pasta and tomato sauce came courtesy of the Egyptian-Italians who’ve always had a presence in Cairo and Alexandria since Cleopatra got chummy with the Romans.
So we have the rice, lentils, pasta, tomato sauce. All the other bits like the noodles, chickpeas and flavourings were added by the Egyptians themselves.
So koshary, as it’s also spelt, is a real hodge podge of flavours and cultures, reflecting the cosmopolitan Egypt of those times.
Homemade Koshari Recipe
Koshari is rustic, honest street food at its best. It may differ slightly from town to town and vendor to vendor, but it still remains an amazing dish of flavours and goodness.
When you go up to a stand or a takeout place serving koshari, the vendors will take out a little container and start filling it up with all the bits in the blink of an eye. They’re so fast, it’ll blow your mind!
But homemade koshari is always going to be a slightly more refined affair, with perhaps a fuller and more rounded flavour. And with a prettier presentation too.
Not a Quick Recipe
I’m not going to lie. Making koshari at home takes some effort. It’s something you need a few hours for because there are so many moving parts to the recipe. You could take the odd shortcut and also make half the stuff the day before, if that makes you feel any better.
So it begs the question: why am I publishing this recipe? I’ll tell you why.
In 2020 and 2021 when the world came to a standstill, I had soooo many requests for this recipe. From readers who had far too much time on their hands, to folks who were bored to tears, to the ones that had their Egyptian holiday cancelled. It was sheer madness, the number of requests I had, and therefore, replies I made!
So mid 2020, I took the time to sit down and write the recipe out, testing out the times, the various permutations and the shortcuts. But this is the first time I’m actually going to be publishing koshari anywhere!
I would say, all in all, it probably takes me around 2 hours to make this recipe, and I’ve carefully laid down all the steps for you in the recipe card below, to make it user friendly. I’ll also show you a couple of ways to cut down on the times and effort.

Cooking Koshari
This is what we’ll be doing. I suggest you get all your stuff ready, and follow the steps as they are laid out in the recipe card below. We will be moving on to the next step as we get one going. For eg., while the onions are frying, we’ll get the lentils going, that sort of stuff.
- If using dried chickpeas, the night before, soak them in plenty of water.
- On the day, cook the chickpeas. (I hour)
- Bloomed Saffron. (5 minutes)
- Fry the onions. (20 minutes)
- Cook lentils and some chopping of ingredients. (20 minutes)
- Rice. (20 minutes)
- Vermicelli (15 minutes) – this step can be combined with rice to cut down on time and effort.
- Pasta. (12 minutes)
- Tomato sauce. (12 minutes)
- Cumin sauce. (2 minutes)
- Assemble and serve.
I know there are lots of components to it. Think of it as an adventure. I always have so much fun cooking koshari, and thoroughly enjoy bringing all the parts together.
Making it Easier
If you wanted, you could also split the recipe and cook half of it the day before. Everything can be made 2 days ahead, with the exception of the cumin sauce, which is best enjoyed within 24 hours.
Just cook what you want, cover and place in the fridge until you are ready to serve it. Then heat it back up gently. Just bear in mind that koshari is served at room temperature.
Vegan Koshari
All you do is omit the very small amount of butter that we use for the noodles, and you’ve got yourself a vegan koshari. Most koshari vendors sell this vegan version.
Ingredients
Chickpeas
I almost always use dried chickpeas when I need them, as I find the final texture to be far superior. They don’t fall apart as easily and have a better resistance with each bite.
SHORTCUT: However, if you prefer, go ahead and used canned chickpeas. No soaking and since they are already cooked, all you need to do is rinse them of the aquafaba and set aside until needed. No need to heat up. 1 whole hour saved here.
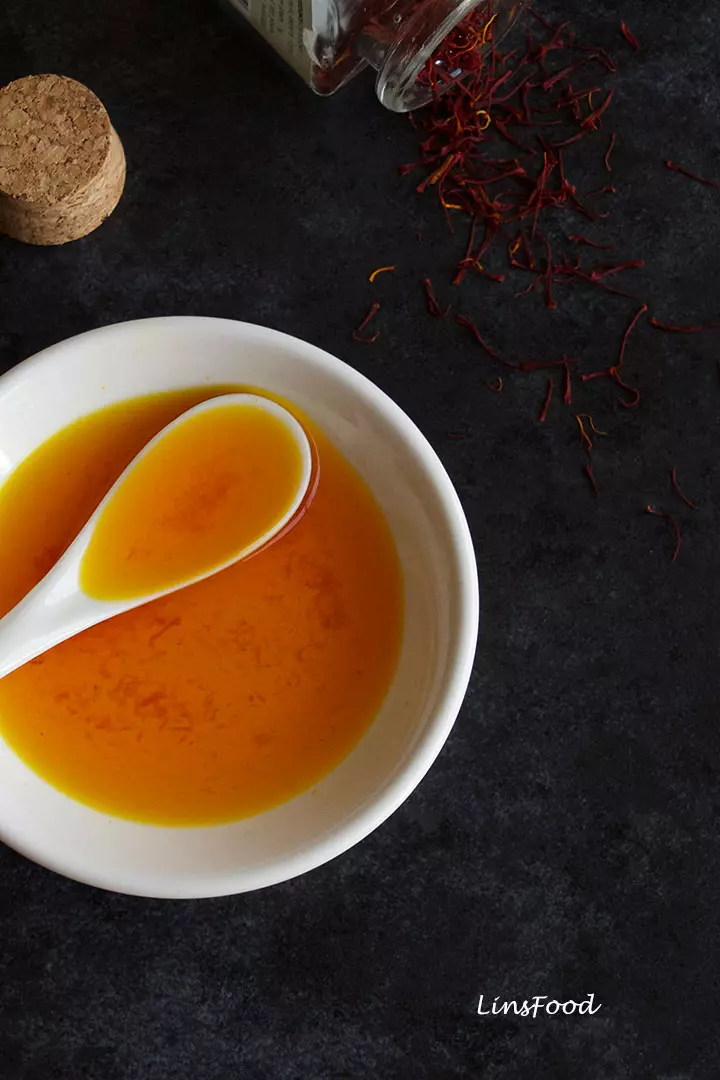
Bloomed Saffron
I’m adding saffron to cook the rice for our koshari, for flavour and colour. I have an article and recipe here talking about bloomed saffron or liquid saffron. Essentially, we crush the saffron with a pestle and mortar, along with some salt (or sugar, depending on recipe) and pour a little hot water over it to soak.
Some people use ice cubes to slowly soak the saffron, but I’ve always preferred the hot water route.
SHORTCUT: I know many crush saffron pistils with their fingers before using. You want to do that for this recipe – go right ahead and just add it to the rice as you are cooking it.
Lentils
We use brown lentils for cooking koshari. They are easily found in most places, and are usually sitting next to the chickpeas and puy lentils.
Some people keep the lentils fairly plain, but I like to add a dash of tomato sauce to them for added flavour.

Rice
The rice traditionally used for koshari is short or medium grain. In many parts of the Middle East, it’s known as Egyptian rice or Mishri rice. I believe that in the US, you have a brand called Calrose.
I’m not too bothered on the rice front and am perfectly happy using the King of rice, basmati.
Vermicelli
When Middle Eastern recipes call for vermicelli noodles, they are talking about the ones used specifically in the recipes of the region. Not the East or South East Asian vermicelli made of rice or mung beans.
They are called reshteh in Persian, and I talk about them in our Persian recipe, Reshteh Polo. You can find them plain or already fried. This is what they look like.

I’m using the plain noodles here, and toasting them in butter (olive oil for vegan koshari), before adding water and cooking them further until they absorb all the water.
It’s an odd way of cooking the reshteh, I know, but it’s how I learnt to do it.
SHORTCUT: A quicker method to cook koshari noodles would be to use the fried vermicelli, cook them like pasta, then toss in butter or olive oil. Many koshari vendors also just mix the broken up noodles and rice.
Can’t find these Arabic vermicelli noodles? Use spaghetti or linguine. They are very, very, similar in flavour. You could even use the Indian vermicelli used for making desserts. These are much thinner but still perfect for koshari. Here is my Amazon affiliate link for broken up Indian vermicelli.
Pasta
You want the smallest macaroni you can find for this Egyptian street food. Ditalini is perfect, small elbow macaroni, the next best thing.
Can’t get either? Use whatever small pasta you can find, but not orzo, which will be too much like the rice in shape and size.

Tomato Sauce (Da’ah)
The tomato sauce is very simply made, like a simple Italian tomato sauce for pasta or pizza. Instead of using fresh tomatoes or canned tomatoes, I’m using Italian passata, which is just strained crushed tomatoes, exactly what you’d do yourself. There’s no pressing or straining involved, making it a simpler process, and tastier too.
This is one of the brands of passata I use (Amazon affiliate link). The one in the image below is very costly on Amazon, as it’s sold in single bottles.

Cumin Sauce (Kamouneyah)
This is described by some people as the vinegar sauce for koshari, which is a pretty apt name, as it is certainly very vinegary and has a spine-tingling tartness.
The Arabic word for cumin is كمون, pronounced kamun, hence the Arabic name for this sauce.
You absolutely must have kamouneyah when cooking or eating koshari, it makes all the difference as it provides additional flavour and lift and is like the final piece of the puzzle. It takes all of 2 minutes to make this, so no excuse not to.
Kamouneyah is a watery concoction. What I do, is blend it after cooking to produce an emulsion which gives a thicker sauce, with the added advantage of most of the garlic being ground up. This is a matter of preference, as as far as aesthetics go, the emulsion is definitely the way to go. But it’s not a traditional method at all. In fact, I’ve never seen anyone else do this.
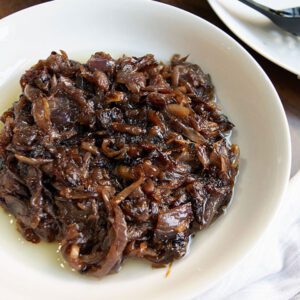
Fried Onions
Fried onions are another piece of the koshari puzzle. They are the final garnish, and usually fried to a dark brown, crispy stage. They provide a caramelised almost bitter flavour.
SHORTCUT: If you’re not a fan of this bitter flavour, fry them until they are a golden brown colour, maybe for just 10 minutes, saving you time.
You can make more of the fried onion topping, or less, as described in the recipe card below. There are no hard and fast rules on this.
When you are done cooking the onions, reserve the oil. As you’ll see in the recipe card below, I use the onion oil a few times to flavour some of the parts for the koshary.
How to Serve Koshari
If cooking it at home, koshari makes a great party dish. If I’m having a large buffet party, I like to serve up all the individual parts (rice, lentil, chickpeas, etc) in separate huge platters or serving bowls. The sauces and garnish will be on the side.
This way, everyone can just help themselves to whatever and however much they want.
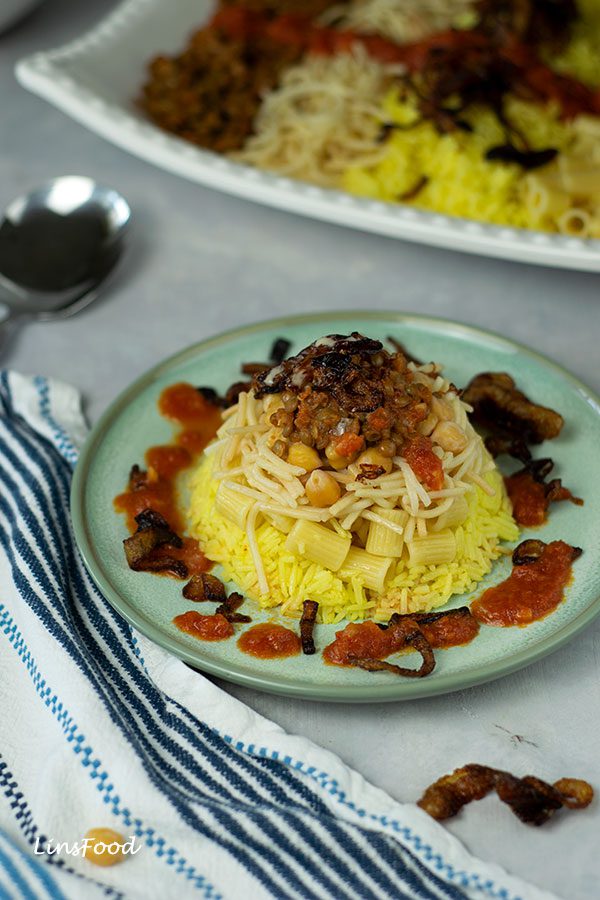
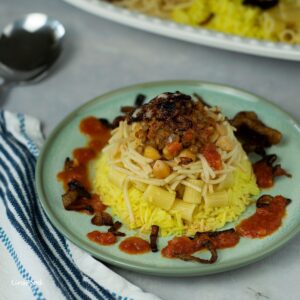
If it’s a sit down meal, I do one of 2 things. Either I serve up all the components on a large platter and place it in the middle of the table, or I make little domes of koshari and serve them as the main.
These domes, called tarabeesh, are also great for a smaller buffet, they look very pretty and exciting placed on the buffet table!
Do you know what’s also good? Having it on the barbecue table as your starch to accompany whatever is on the barbecue (grill).
And there you go. I’ve also provided images for each step to help you on your journey in cooking Egyptian koshari at home.
If you enjoy the recipe, drop me a comment and let me know. And if you are feeling like a star, don’t forget that 5-star rating! Shukran!
If you make this recipe, post it on Instagram and tag me @azlinbloor.
Lin xx
More Middle Eastern Recipes


Koshari Recipe (aka Egyptian National Dish)
Equipment
- Knife
- Chopping board
- bowls as needed
- saucepans as needed
- ladles
- serving plate
- sieve or strainer
Ingredients
Chickpeas
- 60 g dry chickpeas (about 200g/7 oz) canned chickpeas, undrained weight, this is give or take
- water (I don't bother with baking soda, the final effect is rather negligible to me)
Fried Onions
- 2 large onions (or just 1, I love onions!)
- 50 ml vegetable oil
Lentils
- 100 g brown lentils
- water (as needed)
- 1 Tbsp onion oil (from frying the onions)
- leftover chopped onions from above (fried onions)
- 125 ml passata (tomato sauce)
- ¼ tsp salt
- 1 pinch sugar
Rice
- 200 g basmati rice (traditionally, Egyptian short grain rice)
- ½ tsp salt
- 1 pinch saffron
- 2 Tbsp hot water (for the saffron)
- water
Vermicelli
- 120 g reshteh (Persian noodles) (or spaghetti/linguine)
- 2 Tbsp salted butter use EV olive oil for Vegan Koshari
- 250 ml just boiled water
- ¼ tsp salt
Pasta
- 150 g small macaroni type pasta
- 1 Tbsp salt
- water
- 1 Tbsp onion oil
Tomato Sauce (Da'ah)
- 2 medium garlic cloves
- leftover chopped onions from earlier (fried onions)
- 1 Tbsp EV olive oil
- 250 ml passata (tomato sauce)
- ¼ tsp salt
- ⅛ tsp sugar
- 1 tsp chilli flakes (or halve this)
Cumin Sauce (Kamouneyah)
- 2 medium garlic cloves
- 1 Tbsp onion oil
- 1 Tbps ground cumin
- 4 Tbsp water
- 3 Tbsp clear vinegar
- 1 pinch salt
Instructions
THE NIGHT BEFORE – Soak Chickpeas
- If using canned, skip to next step. Place your chickpeas in a large bowl and top with water, ensuring that there's at least 7.5cm/3" of water above the surface of the chickpeas.

COOKING DAY
- Go through the ingredients list above and get everything ready, as they are listed.Get the bottles of oil and vinegar out. Weigh out your lentils, rice, pasta and noodles, whatever you've decided to use.Make sure you have measuring spoons and cups ready to go as needed, including a large, flat plate to place them on so you can re use them.You'll also want a sieve and/or colander for draining the grains and pasta.

Chickpeas
- Drain and rinse the chickpeas. Then place is a saucepan and fill with water. Ensure that there's at least 5cm/2" of water above the top of the chickpeas.Bring to a boil, then lower the heat and cook for 1 hour. Stir in the salt halfway through cooking time.When done, drain and set aside.While the chickpeas are cooking, let's move on to soaking the saffron. Set an alarm for the chickpeas.

Bloomed Saffron
- Saffron is listed with the rice in the ingredients above.Put the kettle on with a little water.Place a pinch of saffron in a mortar, along with a pinch of salt. Grind the 2 with a pestle until you've crushed the saffron a little. Don't worry too much about getting a powder, we want to break it up a little.You could also just crumble the saffron pistils up with your fingers, if you prefer, into a small bowl.

- Top with the 2 Tbsp very hot water and leave to soak until we're cooking the rice.Now, let's move on to the fried onions.

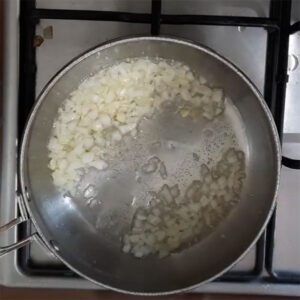
Fried Onions
- Peel and slice the onions into rings. Separate the rings.Save half of 1 onion for our lentils and tomato sauce. We'll be frying the rest now.

- Heat the oil on medium-low heat in a medium wok, deep frying pan or saucepan. Fry the onions for 20 minutes, stirring every 3-4 minutes. If your onions are browning too quickly, reduce the heat to low.

- We want to fry the onions until they are brown in colour. How brown is a matter of taste. If you fry them to a dark, brown, crispy state, they can be a little bitter, and may not be to everyone's liking. This is what I do. So you can stop at the golden brown stage.Or, if you want caramelised onions, see the tutorial here.When the onions are done (see below), use a slotted spoon to fish them out of the oil and place them on a plate lined with 3 layers of kitchen paper, to absorb excess oil.While the onions are frying, let's get the lentils going, but don't forget to stir the onions from time to time. Set an alarm to remind you.
Lentils
- Pick the lentils to remove any grit, then rinse and place in a saucepan. Top with water, with at least 2.5cm/1" water above the lentils. Bring to a boil, then lower heat right down and simmer, uncovered, for 20 minutes.

- Chop onions. While the lentils are cooking, remember the half onion from earlier? Finely chop it all up and divide into 2. Don't forget to stir the onions and check the time for the chickpeas.At this stage, we'll continue with some prep work while waiting for the lentils and onions to finish.

- GARLIC FOR SAUCES. Finely chop the garlic that we'll be using to make the tomato and cumin sauces. Keep the 2 amounts separate and set aside until needed.Pay attention to the onions too, fish them out when they're done.

- Back to lentils. When the lentils are done, drain and set aside.

- Heat 1 Tbsp of the onion oil in the same saucepan on medium heat and fry half of the chopped onions from before for 1 minute.

- Add the passata, salt and sugar and bring to a simmer. Lower the heat down and cook, uncovered, for 10 minutes.

- Tip the lentils in and bring back to a simmer. Cook, uncovered, for 10 minutes to get until you have a fairly dry but still moist mixture. If it starts to dry up earlier, that's fine too.Take it off the heat and set aside until assembly. If you are reusing the saucepan, just dish the lentils out into a bowl.

Rice
- Rinse the rice a couple of times and place in a medium saucepan. Then top with water, add the salt and all of the soaking saffron mix and bring to a boil on medium-high heat. You can also just use a rice cooker, if you have one.

- Cook the rice until the water's been absorbed, and you start seeing steam vents/holes on the surface. Cover the saucepan, reduce the heat right down and cook for 12 minutes.At the end of the 12 minutes, take it off the hot hob.While the rice is cooking, let's move on to the noodles.

Vermicelli
- Break your vermicelli in half and put the kettle on with at least 500ml (2 cups) water.

- Heat the butter (or olive oil for vegan version) in a deep frying pan, wok or roomy saucepan on medium-low heat. Drop the vermicelli in and toast the noodles for about 5 minutes, until they are a golden brown and toasty in aroma.They won't all be evenly browned, don't worry about it.

- Pour in about 125ml (½ cup) water, stir and let the noodles continue cooking to absorb the water. It'll only take 3-4 minutes, depending on your heat and to some extent, the noodles.Add another half cup water and again, stir and let the noodles absorb the water. This should be enough, if not, add more water, a little at a time. It will take about 8 – 10 minutes for the noodles to be fully cooked, like spaghetti.I know this may seem like a strange way to cook the noodles, but the toasty flavour remains pronounced this way. You could also boil them first, then drain and toss in butter. That's much quicker and less hassle, but not as delicious. Read the article above for more on this.Tip out onto a cool plate, when done.

Pasta
- Bring a small saucepan of water to boil on high heat with the added salt. Add the macaroni and cook for 10 minutes, or however long it says on the packet. When done, drain and toss in 1 tsp of the onion oil to stop from sticking. Set aside.While the pasta is cooking, let's do the tomato sauce and cumin sauce.

Tomato Sauce
- Heat the oil in a small saucepan on medium heat and fry the rest of the chopped onions and garlic for 1 minute. Add the garlic and fry for 20 seconds.
- Pour in the passata, and add the salt, sugar and chilli flakes. Bring to a simmer, then lower the heat right down and cook for 10 minutes.Let's get the cumin sauce going during these 10 minutes.

Cumin Sauce
- Heat the onion oil on medium-low heat and fry the garlic for 30 seconds.

- Add the cumin, stir quickly, then add the water, vinegar and salt. Simmer for 1 minute on low heat and it's done.

- Using a handheld immersion blender (or a small chopper/blender), blend your cumin sauce to create an emulsion as well as to grind down the garlic. This is optional, but I think it creates a superior sauce – only on MER, no one else does it, I know!ps: don't worry too much about any odd piece of garlic that remains.

ASSEMBLY, Finally!
- You can place all the different parts in separate dishes or "line them up" in a large dish as in the image. Or create little tarabeesh (domes) by layering everything in small bowls (not the sauces).If served separately, everyone can grab a bowl or plate and dish up a serving of everything, finishing up with a little tomato sauce and a drizzle of the cumin sauce.
Everything on 1 large platter
- Fluff up the rice and dish out onto a large platter.

- Arrange the chickpeas, lentils, pasta and noodles on either side of the rice, in layers as you can see in the images. Top with some crispy onions, with the rest on a plate on the side.Honestly, you can create any pattern you like here. Make circles with the different parts, if you prefer.
- Serve the tomato sauce up in a bowl with a spoon.Pour the cumin sauce into a little jug or also place it in a bowl with a spoon.

Tarabeesh
- Get a small bowl (I'm using one that measures 12cm in diameter x 7cm in height (just under 5" x 3"). This will give you a small serving – with the recipe here, you'll easily get 12 servings. Great for parties!You can layer it anyway you like. I went with rice, pasta, noodles, chickpeas, lentils, fried onions.Let the diners do their own sauces.


Koshari looks absolutely delicious. Always love your presentation, stories(background of the dish) behind each dish. Will give it a try soon.
The best koshari recipe ever! I loved what you did with the cumin and garlic sauce, it’s so much better than the traditional watery version. Thanks Lin.
My pleasure, Cassie. I’m pleased that you like it.