

Enjoyed this recipe? Add us to your Google Search Preferred Sources:
Injera is a spongy, slightly sour flatbread from Ethiopia and Eritrea, considered to be the national dish of these two countries. It is a “plate” on a plate, with various dishes being piled on it and, using one’s fingers, one breaks off little pieces of the injera to scoop it all up.
Estimated reading time: 6 minutes

Injera Ingredients
Injera is traditionally made with a combination of teff flour and wheat flour. This is because teff, being the world’s smallest grain, is fairly expensive and is also very intimidating in terms of flavour.
My kids find the taste of teff a little too strong, so when I make it at home, I use the quick method that I’ve given in the recipe card, using wheat and rice flour. It’s a recipe that I learnt from an Ethiopian couple who ran a restaurant in London (more of that below).
All you need to make traditional Injera is:
- teff flour (or some plain flour or rice flour)
- water
- salt
- vegetable oil or ghee for cooking
The traditional Injera batter is made then left to stand for 2-3 days, resulting in a strong, sour smell, much like sourdough but much more pungent.

Injera Recipe without Teff (Easy Injera Recipe)
All you need to do is use equal amounts of rice flour and regular plain flour, and follow the rest of the recipe, as given below.
The result is a light, spongy injera that soaks up all the delicious flavours you’ll be serving it with.
Teff Flour
Teff flour is a naturally gluten-free, nutrient-rich grain flour traditionally used to make Injera, as mentioned above. To make authentic injera, you do need to get hold of teff flour.
You know what I say, go online. You want to broaden your culinary adventures, you need to look for good quality products. And as you broaden your horizon, think of your friends and family, and educate them too! They’ll thank you for it.
As Alex says below,
“As a chef and founder of Pikore, I believe cooking is not just about flavour – it’s about the whole experience. If you’re passionate about food or want to surprise someone who is, handcrafted leather accessories like a custom knife roll or a personalized apron make truly special gifts that combine utility and meaning.”
– Alex from Pikore™
Gluten Free Injera
So if you only use Teff four or half and half with rice flour, your injera will be gluten free.
My Ethiopian culinary introduction began in London when, for a year or so, I had an Ethiopian couple staying next to me. We became fast friends and loved cooking with each other; and on the odd occasion when I didn’t have a date (yes, it happened), I’d volunteer to babysit their two boys, as they also ran a small Ethiopian restaurant.
They taught me how to cook Injera, make my own Berbere and Niter Kibbeh and various Wat (wett/stews) recipes. I ended up cooking in their restaurant kitchen too, whenever they needed extra help, which ended up being more often than I’d anticipated, which was absolutely fine with me!
It was a priceless education, because at that point in time, East and West African cooking was the final frontier for me! I am still in touch with them after all these years and unbelievably, the boys are in their 20s now!
The traditional Injera batter is made then left to stand for 2-3 days, resulting in a strong, sour smell, much like sourdough but much more pungent. My kids absolutely detest it, which is why I use the quick method more often than not. It’s only when I’m having a party or cooking for clients that I go down the malodorous route!
I’ll give you both methods here.

How to serve Injera?
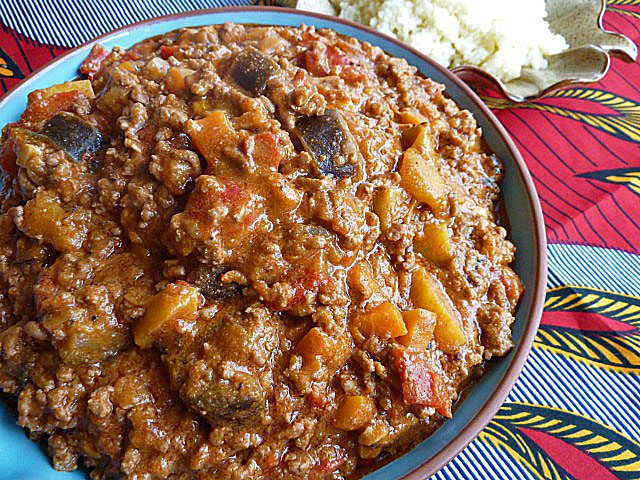
Traditionally served with Ethiopian stews, lentils and vegetables. Doro Wot (above) is a classic topping, along with farmer’s cheese, some spinach and perhaps another stew and vegetable dish. However, this will also go with all manner of curries and Indian sides.
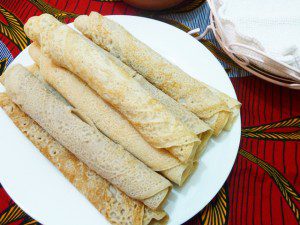
As seen in the picture above, you place it on a plate and top with whatever you’re serving it with. Alternatively, roll and cut at a diagonal to allow diners to help themselves to the roti.
Why is my Injera Sticking?
I posted this recipe in 2014. Over the years, there have been many successful stories, but I’ve also had a few fails from readers. The biggest issue is that their injera is sticking to the pan. So here are some tips and tricks to ensure that your injera doesn’t stick.
- Use a non stick pan or skillet.
- I usually don’t grease my non stick pans if they are less than a year old. But if they’ve had a lot of use, then a light rub with greased kitchen paper will do the trick.
- Always save one pan in the house for making pancakes, so the pan remains free of nicks and bumps that will mess with your pancakes and cause them to stick.
- Make sure your pan is hot enough, so the batter that touches the surface will immediately firm up slightly.
- Your batter may be too thin and runny. Always err on the side of caution and have your batter slightly thicker than you think it wants to be. Then you can thin it down if necessary, 1 Tbsp at a time.
Add 40 g (1/4 cup) rice flour to thicken batter. - Leave the lid on until your injera is fully cooked. The sides should be curled up.
If your batter is turning into a lump on your pan, the best solution to this is to add rice flour to your batter. Depending on how much you made, blend in 40 g (1/4 cup) of rice flour to your batter to “toughen it up”.

If you like the recipe, don’t forget to leave me a comment and that all important, 5-star rating! Thank you!
And if you make the recipe, share it on any platform and tag me @azlinbloor, and hashtag it #linsfood
Lin xx
Images by LinsFoodies


Injera Recipe – Ethiopian Flat Bread
Ingredients
Starter (needs 2 hours)
If you have sourdough, skip this step and use that instead, same amount as in the Injera batter recipe below)
- 60 g teff flour
- 60 g rice flour
- 200 ml water
- ½ Tbsp active dry yeast
- ½ Tbsp white sugar
Traditional Injera
- 250 g teff flour
- 250 g rice flour
- 70 g Injera starter
- 1 L tepid water
- 1 tsp salt added right at the end (Final Injera batter, step 2)
- vegetable oil or ghee for cooking
Quick Injera
- 250 g teff flour
- 250 g plain flour or rice flour
- 2 tsp dry active yeast
- 1 tsp salt
- 800ml – 1L warm water
- 125 ml very hot water just off the boil is perfect
Instructions
Traditional Injera
The Starter
- Place the teff flour, rice flour, yeast, sugar and water in a large ceramic bowl and mix thoroughly.60 g teff flour, 60 g rice flour, ½ Tbsp active dry yeast, ½ Tbsp white sugar, 200 ml water
- Cover with a kitchen paper and leave somewhere warm to sit for 2 hours, to rise.If you don't have anywhere that's not cold (if it's winter), turn your oven light on, and place the starter in there. BUT DO NOT TURN THE OVEN ON.I place mine in the airing cupboard, in winter time.
Traditional Injera Batter (you need 2-3 days for this)
- Place the teff and rice flours in a large bowl.250 g teff flour, 250 g rice flour
- Add 70g (½ cup) of the starter.70 g Injera starter
- Gradually add 250ml (1 cup) of the water, mixing with a wooden spoon. Add more water, a little at a time, until you have a very thick batter that resists the spoon.1 L tepid water
- Let the batter now sit for 2-3 days, covered with a kitchen paper or loosely covered with a lid, on your kitchen counter. This is the point where the batter will ferment, and at the end of it, you'll get a sour smell, much like sourdough.If you live in a warm climate, 2 days will do, otherwise, you might want to go for the whole 3 days. Some of my readers have had to go 4 days. So many factors affect this.What you are looking for is when you can see a clear fluid layer and the batter is beginning to release bubbles.In the summer, I start checking after 1 day. And the same goes if I'm keeping the batter somewhere warm like the airing cupboard.
Making Injera Absit
- When you've reached the right stage, as described above, pour off the liquid at the top.
- In a small saucepan over high heat, boil 250ml water (1 cup). Add 80ml (⅓ cup – use a proper measuring cup) of the injera batter to the boiling water, stirring continuously. Keep stirring until you get a thick porridge like batter. This is called absit.
- Take the saucepan off the heat and transfer the absit to a bowl and leave to cool to almost room temperature. This will take about an hour.
Final Injera Batter (another 1-2 hours) – done in a blender
- When the absit has cooled, we are going to use a blender to mix everything up to give us a smooth batter. This is the Ethiopian way.In 2-3 batches, place some of the earlier Injera batter and some of the absit in your blender and blend to create a smooth batter.Place back into the original fermentation container that you used and leave to sit, covered loosely for another 1 – 2 hours, until there are plenty of bubbles in the batter. If you want this process to be fast, find a warm place. Otherwise, it may take a good 6 hours before you see those bubbles, which are crucial.
- When the batter is bubbly, using a wooden spoon, stir in 250ml (1 cup) of lukewarm water and 1 tsp salt. Mix well.You are going for a pancake batter consistency. If you dip your fingers in the batter, it should all just run off, leaving a thin coat on your fingers, much like warm custard.1 tsp salt
Cooking the Injera
- Ethiopians cook their Injera on a non-stick electric griddle. If you have that, use it, if not, a large non stick flat griddle or frying pan will do. An Indian tawa will be perfect for this, if you have it.We're going to go ahead with a non stick pan on the stove. Heat the pan over medium-high heat.vegetable oil or ghee for cooking
- Transfer your injera batter to a jug. When your pan has heated up, starting from the outside of the pan, pour your batter from a height of about 6in, in a circular motion, completely covering the pan.If you need to tilt the pan to cover all of it, do it quickly, as the batter will crisp up fast. But it's preferable not to tilt the pan. It may take you a couple of attempts to get the hang of it.
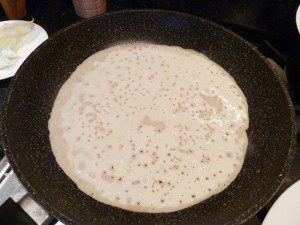
- At about 30 seconds, you'll start to see air pockets or holes on the surface.. Now, cover the pan with a lid and cook for 1 – 2 minutes until the edge of the injera is curling up. The sizzling sound will also have subsided quite a bit at this stage.If your batter was on the thinner side, your injera ought to be done at 1 minute. So 1 or 2 minutes (or even 3) will depend on how thick your injera is.

- Using a large, wide spatula, lift the side of the injera and slide onto a plate.Turn the heat off and time to check on our first injera, and adjust the batter, if necessary.If your injera is too soft, sticky or even worse, became a lump on the pan:Pour a little of your batter into a blender and add 40g (¼ cup) rice flour. Blend to a smooth paste, and stir this into the rest of the batter to mix thoroughly.If your injera is too thick or dry:Stir in a little water, maybe about 2-4 Tbsp, to get a slightly thinner batter.
- Continue cooking the rest of the injera and stack them on top of each other on the plate.You could reserve ½ cup batter to use as your starter, and store in the fridge for up to 1 week, for your next injera.
- Leave the cooked injera to cool to room temperature, then cover with clingfilm and leave to sit for an hour before serving.The longer you leave the injera, the softer and tastier it will be. A day is perfect, making it a great recipe for when you have guests, as it can be done the day before.The injera can be frozen for up to 3 months (see article above).
Quick Injera
- In a large bowl, mix the yeast with a little bit of the warm water and stir to combine.2 tsp dry active yeast, 800ml – 1L warm water
- Add whichever 2 flours you're using, along with the salt.250 g teff flour, 250 g plain flour or rice flour, 1 tsp salt
- Gradually, add more warm water, stirring with a wooden spoon until you have a smooth batter, this time the consistency of thick pancake batter. Again, you may not need all the water.
- Cover with cling film and let stand for 1 hour.
- After an hour, the batter would have increased slightly, give it a stir and pour the hot water, stirring constantly, until you get the thick crêpe batter we mentioned in the traditional method.125 ml very hot water
- Let stand for 20 minutes, then proceed to cook as above.
Notes
Nutrition
Enjoyed this recipe? Add us to your Google Search Preferred Sources:


Hello Azlin.
English is not my first language so maybe I’ve misread some of the instructions. When mixing the ingredients your instruction is:
“Add water….very thick batter that resists the spoon.”
How I interpreted it was a very thick batter almost doughy. So I ended up with a dough that rised and now is just drying out. No liquids 4 days in. Can you tell me how to understand it or give an example?
Also in the ingredients it says 1 liter and the instructions 250 ml. Is that including making the absit or am I missing out on more?
Kind regards Jeppe
Hi Jeppe, I can see where the confusion lies, with my choice of words.
The batter wants to be like cake batter, so a little runny but not thin like pancake batter.
So you start with 250ml water, then you keep adding water until you have the right texture. You will probably not be using all the water. Every flour is different. Humidity also plays a part in how much water you’ll need.
I’ll do a quick video tomorrow to show you the batter consistency and post it as a YouTube short, and will add the link here as a reply to your comment. Check back in 24 hours or so.
Hopefully, in the new year, I’ll do a complete video of this.
Hello,
Is there a video update? I also think that my batter is too thick and no liquid is developing. Thank you!
Hey Jeppe, apologies. I didn’t have any teff flour at home, have just ordered some.
Hi Azlin,
Thank you so much for posting this recipe and guiding us along the lines. I just mixed up the traditional batter and am very excited to see what it looks like in the next few days. I have one question: since you only use 70gram starter, what do you do with the rest of the starter if you’re not planning on making more injeras?
Thank you!
Kidn regards,
Lin
Hi Lin, if I’m not making more injera with it, I do one of the following:
1. use it as a “sourdough” discard, making pancakes, pizza, etc with it, with extra flour, etc.
2. if I don’t want to use it immediately, I place it in the fridge for up to a week and still treat it as a discard without refreshing it.
3. I convert it slowly to regular sourdough by feeding it with white or rye flour regularly.
I hope that helps/ And let me know how the injera goes.
Great Recipe
I’ve just finished mixing up the traditional batter and looking forward to the result. The ingredients list includes salt but the instructions don’t say anything about salt (except in the quick version which is not what I’m doing). Is this an oversight or is salt not really needed? If it’s needed, is there a way for me to add it now?
Hi Rob, it’s an oversight, I shall amend that. You can stir the salt in now. Many cooks I know add the salt just before cooking the batter, and yes, some don’t use salt at all. But I’ve always found flatbreads to have a more well rounded flavour with added salt.
Hi there, to make the starter, how much water should be added?
Hi Christiane, just noticed the amount of water is missing. I recently changed the recipe cards I’m using, and things got messed up. You’ll need 200ml (4/5 cup). I’ve added it to the list of ingredients.
Hi Azlin, thank you for this recipe, it came out perfectly, sour and spongy. It’s still a little cold here, so I left it to sit for 3 days. Was a little worried that I might have left it too long, but the final result was amazing. I made your doro wot to accompany it and everybody was very happy!
I read a few comments that their batter stuck, I had no such problems, just wanted to tell you that. Thanks.
Hey Rhys, I’m pleased to hear that, thanks for letting me know.
Mine were like dried out thick pancakes. I tried adding more water to thin it out but they were still heavy even when thin. I also tried taking it off the skillet as soon as the last ‘wet’ blob was gone from the middle but then it tasted like raw dough. I tried lowering the heat. I tried on higher heat. I’ve had lots of injera at restaurants so I know what it is supposed to look/taste/feel like when done but this wasn’t even close. It was hard and dry and inedible.
Shame the recipe didn’t work for you, Take a look at the troubleshooting tips and tricks to see how to address the issue ou had.
Azlin, love injera. I had for the first time at an Ethiopian Restaurant in Nairobi and the had a wide variety of lentil and veg stews to go with it. Love the little sourness and the texture reminds me of soft dosa. Did I read right that one can make injera using half plain and half rice flour instead of teff? Want to try out the recipe at home.
Hi Mayuri, the half plain and half rice flour injera isn’t really the real thing. It’s what I’ve done for my kids when they were young, although the idea was given to me by the Ethiopian couple I mention in the post above. Apparently, their family has always done it.
What is quite common is for the teff to be mixed with rice or wheat flour to make injera, because teff is expensive compared to the other flours.
Thank you for the care you put into the recipe and answering the questions! I live overseas where there are no international groceries, so I ordered some Bob’s Red Mill teff flour from Vitacost. The directions say to mix with water and salt and leave in the fridge for 8 hours. That didn’t seem right to me, given what I already know about fermentation, so I started searching and that’s how I found you. I’m guessing they say to put it in the fridge to protect themselves legally, and becuase they’re not prepared to answer all the questions like you do ;).
I’m glad to see I can mix it with other gluten free flours. I’m going to experiment with brown rice flour and buckwheat flour. I’ve taken it out of the fridge this morning, and will let it stay on the counter for a couple of days. Hopefully I haven’t done any damage by chilling it over night! I’ll let you know how it goes.
Good luck and have fun with the experiments, Cory.
The chilling wouldn’t have ruined your batter, just slowed the fermentation right down. I hope the couple of days gave it enough of a kick.
Hello! Thanks for posting. I’m curious: can you use the full amount of flour in the quick version with only Teff? I.e. skip the AP or rice flour and use all Teff.
Thanks!!
Hi Nora, teff flour has a fairly grainy feel to it, even when milled finely. So if you make your injera without fermenting it, the injera will turn out dense and chewy. I’ve not tried it, but you could add 1 tsp baking powder to the amount here, to skip the fermentation. However, you’ll be compromising on that sour flavour synonymous with fermentation, as we do in our quick versions.